Friday, January 31, 2014

Can you re-use Christmas wrapping paper?


Yes! Surprisingly you can! Even if it is creased! Here is how:
I know Christmas is over but here's a project of recycling wrapping paper that I did to make cards. 

By the way, if the picture looks so good, it's because I got the help of a great photographer! He taught me how to setup a studio very cheaply and made these great pictures. His name is Andrew O'Toole and I definitely recommend him. He does workshops and freelance.

To return to our tutorial, the good thing about making these cards is that they are cheap to make and you don’t have to cut and measure the exact square shapes for every part of the tree to make a good impression. ( which is quite time consuming let’s be honest here, especially if you are doing a few!)
First:
Cut approximately a square shape into your creased wrapping paper and fold it from corner to corner with the patterned facing upwards. ( if it doesn't fit, exactly, then cut it so it does!)

step2: Then fold from corner to corner in the opposite direction.
step3: Open your paper up, it will now have a cross in the middle.
step4: Then crease your paper in half  ( so it becomes a rectangle shape and if it doesn't exactly fit like a rectangle, you can cut it so it does!)), bring it back to its square shape and fold it the other way.
Now you are a star shape in the middle of your paper.
step5: Then next part is the tricky bit: you need to push up the center from the white side it should pop into this position below leaving you with two of the folds facing down. Push the two full triangles together.


step 6: Fold the triangle making yet another triangle! You do that by pull the point downwards so that the edge of this section of the triangle is butted up to the centre fold you have made.You do the same for the side and then for the other 3 squares.
step 7: then I glued the back of the triangle and lay your 3 triangles out in a row from large to small.
step 8: I glued a pretty ribbon at the top of the card  and the bottom of the card and voila.


For a detailed instruction on how to do the Christmas tree, below is a link to a blog that explains it step by step (better explained.):

http://cliona-at-night-owl.blogspot.ie/2011/12/folded-christmas-tree-card-tutorial.html


Project recipe:
Project difficulty:  easy
  • Already used wrapping paper.
  • Scissors
  • 2 pieces of ribbon
  • Glue
 I hope this helps.
Laura.

Thursday, January 9, 2014

Santa with a Moustache Christmas Card

Hi Everyone,
A friend of mine's father used to have a moustache and suggested to make a card of Santa with a Moustache! I thought that was brilliant. So I did just that!

Project 1: Santa with a Moustache.
I cut a moustache shape from a black packaging.
For the top part of the card, I cut the roof design of an "El Paso" Packaging to give a Spanish feel on the card.


For the bottom part of the card, I cut the edge of a Doily Set Paper to give the effect of my Santa standing on a little mount of snow. This is to give  the intricate design of the snow.


 For the middle part, I had a Santa "left over" from a card making kit so I use it and raised him with foam squares.

Project 2: Making an Owl Greeting Card.
I also had someone I know who really likes Owls, so I made a card for that person out of a pink divider tab ( for the body part) and Thornston Chocolate packaging for the wings.
For the belly,  I used a traditional hole punch and used the paper bits for the dots. I use Christmas Decoration packaging to make the purple flower. I didn't invent that design. I looked on the Internet and find a cute owl design which I copied.


Project 3: Making a Cut Cat Greeting Card.
I know someone who likes Cats. Again I didn't invent that design. I looked on the Internet and find a cute cat design which I copied. I used a red divider tab for the background and a blue divider tab for the cat's body. I used a Jacob's Biscuits for Cheese packaging for the orange/yellow ears and paws.


Sorry for the quality of the images. I took a quick picture before giving them away.

I like a challenge so if there's something you have in mind as a greeting card for someone special for Valentine's Day or just to say Hello, let me know and I'll try to do it out of recycled materials.
Because it is rather time consuming, I charge 3 euros per card.

Monday, January 6, 2014

How to make a simple christmas wreath on a shoestring


Hi Everyone,
I noticed some amazing Christmas wreaths on sale in flower shops and in design shops round the City center back in mid-December.
Although I had never made a Christmas wreath before in my life, I decided to give it a go.

I noticed that those shops used beautiful dark willow branches to make their own Christmas wreaths.

Unfortunately the price of willow branches was minimum 4 euro added to the price of buying a wire and bows and other little decorations, the cost of my wreath was going to be about the same as the ones in the shops so I thought to give it a miss.

Coming home one evening I noticed fallen branches on the pavement (blown away with the wind we have had lately) and those branches seem to be very flexible, nice and bare enough to make a wreath. "Hurrah!" I thought, " here's my wreath!"

So I collected them.

I wanted to add pine cones to my wreath too and found some as well on the ground near I live.

Surprisingly enough, I had a red wire and had bought previously Christmas ribbons ( see previous post: http://laspeedwing.blogspot.ie/2013/12/how-to-make-pretty-christmas-tree-out.html )

I found red bows and silver bells in a pound shop and so all I had to do now was to start putting all this together.

So this is my project recipe:
- red wire
- mini pine cones ( attached to broken branches if possible)
- dead branches
- scissors
- 5 red bows
- 3 silver bells

First I divided the branches into 2 bunches of branches and attached them with a red wire.


For the next part, I needed an extra pair of hands to hold the 2 bunches of branches together and used my red wire on each side again. That's 4 ties around the branches.

The branches still look all over the place so I added an extra 4 wired ties around my wreath (that's 8 ties now) I then stuck the pine cones branches in each tie and this is how it looked like then:


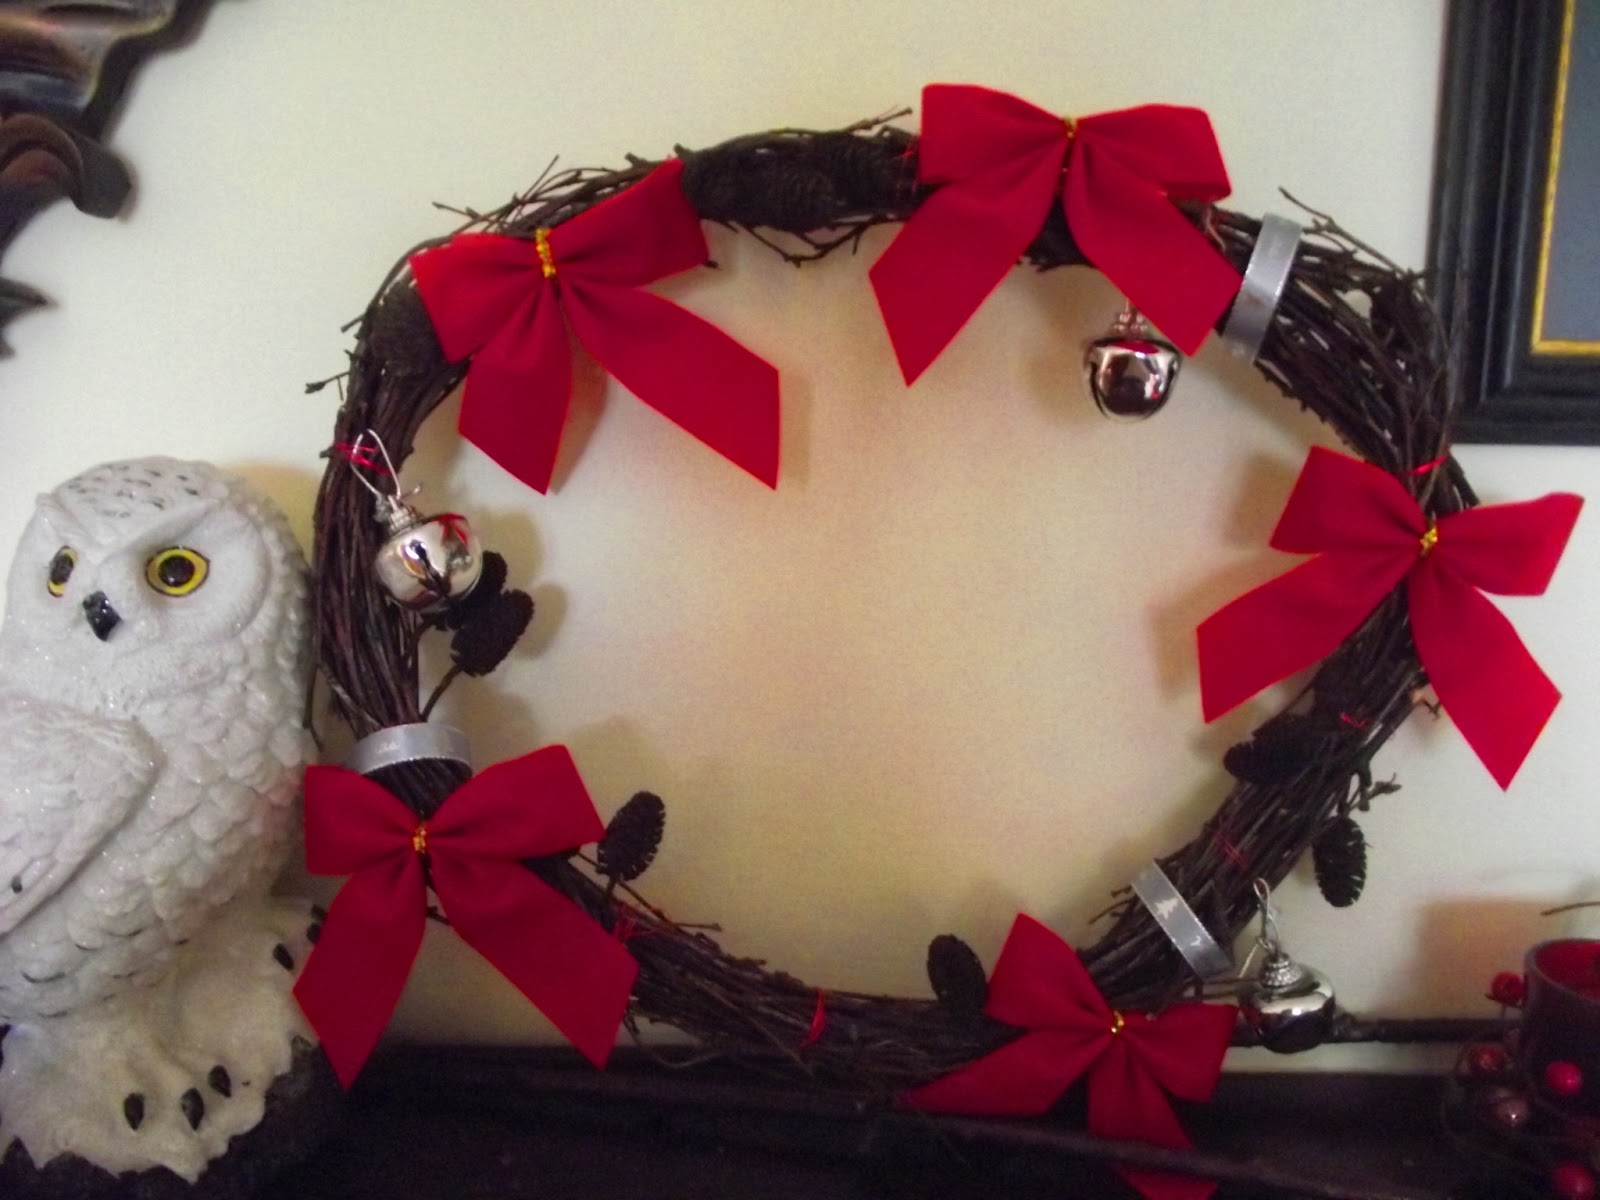
The last part was easy. I trimmed the excess of branches, tied my red bows and bells on the branches and sewed 3 ribbons around my new wreath. ( but you can add more ribbons and make them twirl around your wreath)  and this is the final result:


I suppose it isn't bad for my first attempt.
In fact just between you and me, I was quite proud of myself to offer this as a Christmas gift to a friend of mine. Eco friendly enough and limiting in my own little way the frantic consumerism at Christmas ;-)